Hardening VM on GCP using Google Cloud Armor

I know this blogging system runs on WordPress. So our WordPress on GCP are under attack by bots causing DDoS and I had to take them down by deleting NS Records (duh). It’s time to use mod_security2 as I did before on onprem servers. Google rebranded mod_security2 as Google Cloud Armor (GCA). This article is for documentation purpose only, use it with caution.

Prerequisite

  • A backend service is already configured in (classic) load balancer.
  • You’re familiar with gcloud CLI.
  • Your public IP address is within GCP VPC Network

Things to do
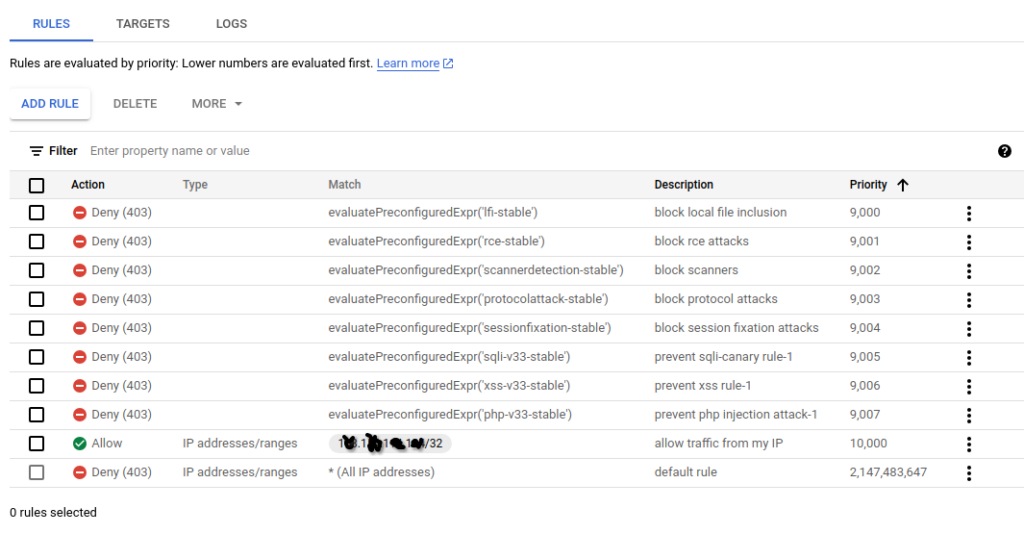
First thing first: create policy name “block-with-modsec-crs”

gcloud compute security-policies create block-with-modsec-crs --description "Block with OWASP ModSecurity CRS"

Create priority number 2147483647, the lowest rule for our block-with-modsec-crs policy, give it action deny-403 as per GCA rule.

gcloud compute security-policies rules update 2147483647 --security-policy block-with-modsec-crs --action "deny-403"
Read more

Enable HSTS – Apache – openSUSE Leap – GCP

Now you want to secure your Apache so it shows HSTS status with padlock icon in URL bar. This is my environment:

Now here comes the editing part:
Go to /etc/sysconfig. Open apache2 using vi. Add “headers” in “APACHE_MODULES”. Save and quit. Then go to /etc/apache2/vhosts.d/vhost.yoursubdomain.conf. Add the following line:

<VirtualHost *:80>
 Header always set Strict-Transport-Security "max-age=63072000; includeSubdomains; preload" 
 ServerName subdomain.yourdomain.com
 RewriteEngine On
 RewriteCond %{HTTPS} off
 RewriteRule (.*) https://%{HTTP_HOST}%{REQUEST_URI}
</VirtualHost>

<VirtualHost *:443>
 Header always set Strict-Transport-Security "max-age=63072000; includeSubdomains; preload"
SSLEngine On
# Put other configuration here.
</VirtualHost>

Do stop apache2 service: systemctl stop apache2
Do start apache2 service: systemctl start apache2
Verify your HSTS configuration using bash terminal: curl -s -D- https://subdomain.yourdomain.com/ | grep -i Strict. It should print: strict-transport-security: max-age=63072000; includeSubdomains; preload

Bonus: put this line after SSLEngine On

SSLProtocol -SSLv2 -SSLv3 -TLSv1 -TLSv1.1 +TLSv1.2 +TLSv1.3
SSLCipherSuite HIGH:!aNULL:!MD5:!3DES
SSLHonorCipherOrder on

That configuration should disable TLS1.0 and TLS1.1 plus enable the TLS1.2 and TLS1.3 if they were supported by your apache version.

XML-RPC and WordPress

So, have you try to type this at WordPress URL Bar: https://some.wordpress.site/wp-json and find out the XML syntax all over the page?

Some say it was a feature, some say it was a backdoor. If you own a WordPress site with XML-RPC enabled, do not be scared. It is normal. It is a functioning XML-RPC call. But if you want to shut it off, do the following.

  1. Edit .htaccess. Add the next line:
    Redirect 301 /xmlrpc.php https://www.google.com
  2. Edit /wp-content/themes/your_theme/functions.php with the following code:
add_filter( 'rest_authentication_errors', function( $result ) {
// If a previous authentication check was applied,
// pass that result along without modification.
if ( true === $result || is_wp_error( $result ) ) {
return $result;
}
// No authentication has been performed yet.
    // Return an error if user is not logged in.
    if ( ! is_user_logged_in() ) {
        return new WP_Error(
            'rest_not_logged_in',
            __( 'You are not currently logged in.' ),
            array( 'status' => 401 )
        );
    }

    // Our custom authentication check should have no effect
    // on logged-in requests
    return $result;
});

Taken from:

1. https://www.shellhacks.com/wordpress-disable-rest-api-restrict-access/

2. https://wpdynamic.com/wordpress-developer/wordpress-code-snippets/how-to-disable-the-wordpress-json-rest-api-without-plugin/

3. https://www.greengeeks.com/tutorials/how-to-enable-and-disable-xmlrpc-php-in-wordpress-and-why/

PHP Fatal error: Call to a member function result() on boolean

Error PHP Fatal error: Call to a member function result() on boolean di Code Igniter terjadi di CI versi 3.1.x yang disebabkan versi PHP tidak setinggi versi MariaDB/MySQL. Ini biasanya terjadi di database yang bertema cloud seperti CloudSQL milik GCP.
Saran pertama: upgrade ke CI versi 4. Cara ini selalu memakan waktu yang lama karena aplikasi ditulis ulang dari nol tapi sangat bagus untuk menjaga kompatibilitas versi PHP, CI dan MariaDB/MySQL di masa depan.
Saran kedua: edit sql-mode di MariaDB/MySQL supaya backward compatible, yaitu dengan cara edit di my.cnf, hilangkan ONLY_FULL_GROUP_BY.

Cara check sql-mode adalah jalankan query ini:

select version(),@@sql_mode;

di MySQL/MariaDB terminal atau di GUI Database Anda.

Redirect port 80 ke 443 di apache2.

Menurut saya, cara redirect dari port 80 ke port 443 sebaiknya menggunakan module mod_rewrite bawaan paket software apache2. Cara ini lebih menghemat resource dan lebih cepat. Jurus ini berlaku di apache2-2.4.51 opensuse 15.3. Ada 2 file yang terlibat disini. File pertama adalah /etc/sysconfig/apache2. Di file ini, ketik “rewrite” di bagian APACHE_MODULES. File kedua ada di /etc/apache2/vhosts.d/. Buat file virtual host menggunakan standard apache2 yaitu vhost.subdomain.conf. Isi file tersebut dengan direktif sebagai berikut:
=====================================================================================

<IfDefine SSL>
<IfDefine !NOSSL>

##
## port 80
##
<VirtualHost *:80>  
ServerName siakad.pancabudi.ac.id
RewriteEngine On
RewriteCond %{HTTPS} off
RewriteRule (.*) https://%{HTTP_HOST}%{REQUEST_URI}
</VirtualHost>
##
## port 443AllowOverride All
##
<VirtualHost *:443>

       #  General setup for the virtual host
       DocumentRoot “/home/taufik/mount-siakad”
       ServerName siakad.pancabudi.ac.id:443
       ServerAdmin [email protected]
       ErrorLog /var/log/apache2/siakad-error_log
       TransferLog /var/log/apache2/siakad-access_log

       #   SSL Engine Switch:
       #   Enable/Disable SSL for this virtual host.
       SSLEngine on

       #   You can use per vhost certificates if SNI is supported.
       SSLCertificateFile /etc/apache2/ssl.crt/sertifikat.crt
       SSLCertificateKeyFile /etc/apache2/ssl.key/kunci.key
       SSLCertificateChainFile /etc/apache2/ssl.crt/chain.crt

       #   Per-Server Logging:
       #   The home of a custom SSL log file. Use this when you want a
       #   compact non-error SSL logfile on a virtual host basis.
       CustomLog /var/log/apache2/ssl_request_log   ssl_combined
       <Directory “/home/taufik/mount-siakad”>
               Options Indexes FollowSymLinks SymLinksIfOwnerMatch
  AllowOverride All
               Require all granted
       </Directory>
</VirtualHost>

</IfDefine>
</IfDefine>

GCP Load Balancing SSL

Kamu adalah seorang sysdamin (veteran) yang diberi misi menjalankan web server di GCP. Di GCP, menjalankan service apache2 tidak semudah di baremetal krn GCP punya “aturan tersendiri” menjalankan service apache2. Asumsi blog ini:

  1. Pastikan service Firewall di bagian VPC Network sudah di-config utk SSH, HTTP, HTTPS dan port 3306.
  2. Komputer desktop di jaringan internal perusahaan sudah terhubung secara VPN ke GCP karena ini set up hybrid. pastikan komputer desktop (atau laptop) bisa ping IP Internal VM.
  3. Kelas tier network yang digunakan adalah Premium Tier.
  4. VM dibuat menggunakan image openSUSE 15.4 x86_64.
  5. Sudah familiar dengan perintah dasar Linux seperti scp, mkdir, ssh, systemctl dan lain sebagainya.

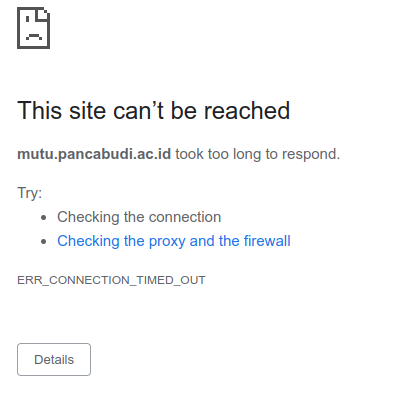
Oke, selanjutnya, kamu copy SSL Certificates ke direktori tujuan, edit apache2 sysconfig dengan flags SSL enable dan module php8 loadable. Kemudian perintah sakti “systemctl start apache2.service” meminta pass phrase SSL, output “systemctl status” juga tidak ada masalah: apache2 berjalan tanpa error. Membaca secara seksama log apache di /var/log juga tidak ada yg aneh. Tapi KENAPA APACHE2 TIDAK BISA DIAKSES dari LAN? Pakai mobile data lancar jaya. Pakai wifi yg bukan LAN internal pun bisa diakses secara tempo yang cepat. Ini diakses dari LAN Internal malah kasih pesan error connection timed out. APA YANG SALAH?

Tenang, Slur…..

Tarik nafas dulu dalam-dalam.

Saya kasih tau rahasianya, Slur: jurus di on premise tidak akan jalan di cloud. Infrastruktur di onpremise tidak sama dengan yang di cloud dan salah satu yang membedakannya adalah: FIREWALL. Selain firewall, manajemen VM di onpremise beda dengan manajemen VM di cloud. Apa boleh buat. Mesti belajar lagi dari awal tentang cloud.

Cara menjalankan service apache2 menggunakan openSUSE 15.4 di GCP (for the impatient):

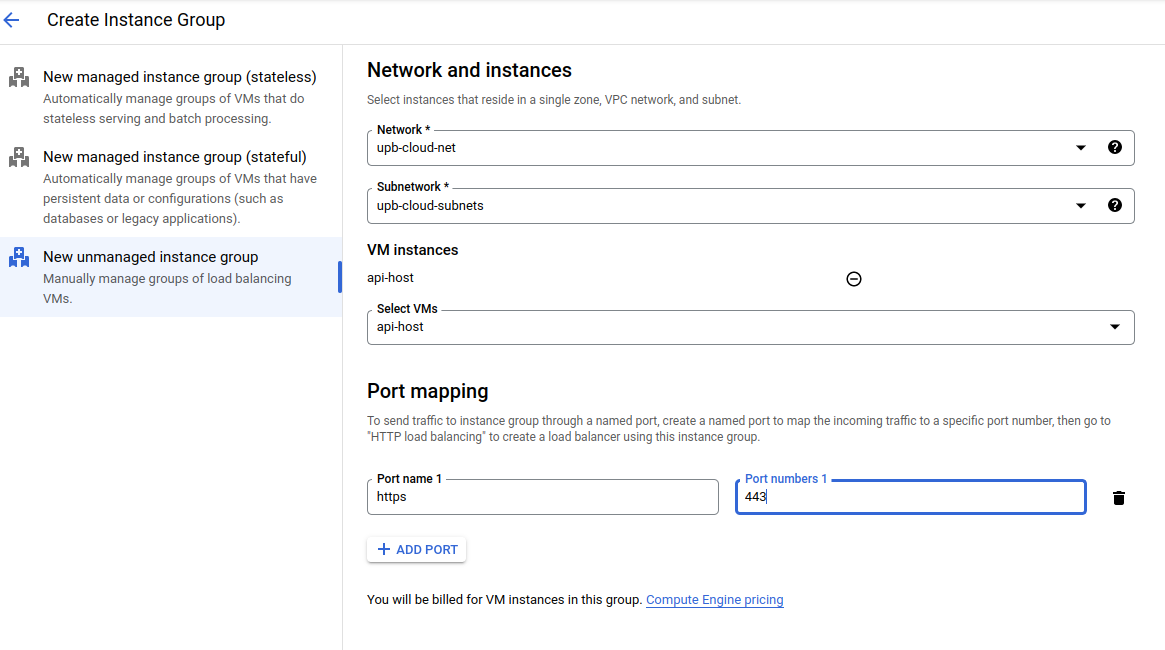
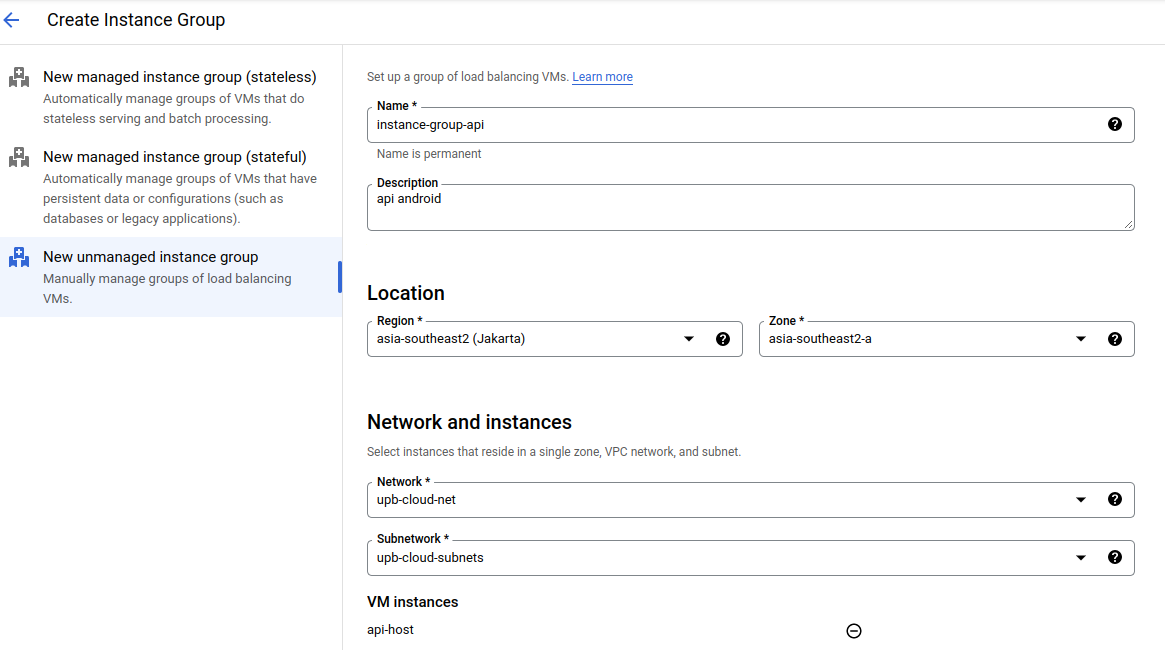
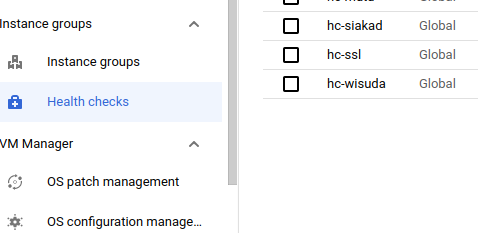
  1. Create Instance Group di bagian Compute Engine. Pilih New Unmanaged Instance Group.

  2. Masih di bagian Compute Engine, create Health Check.
  3. Di bagian Network Services, klik Load Balancing.
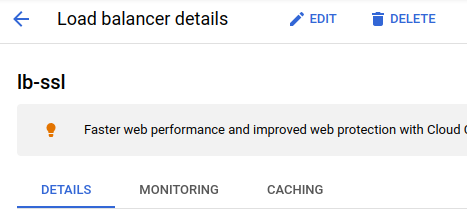
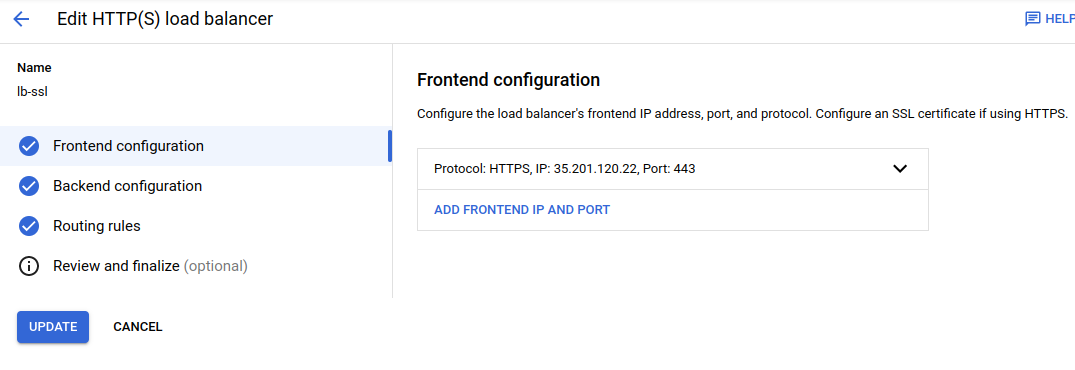
  4. Klik nama Load Balancers-nya. Kemudian klik Edit.

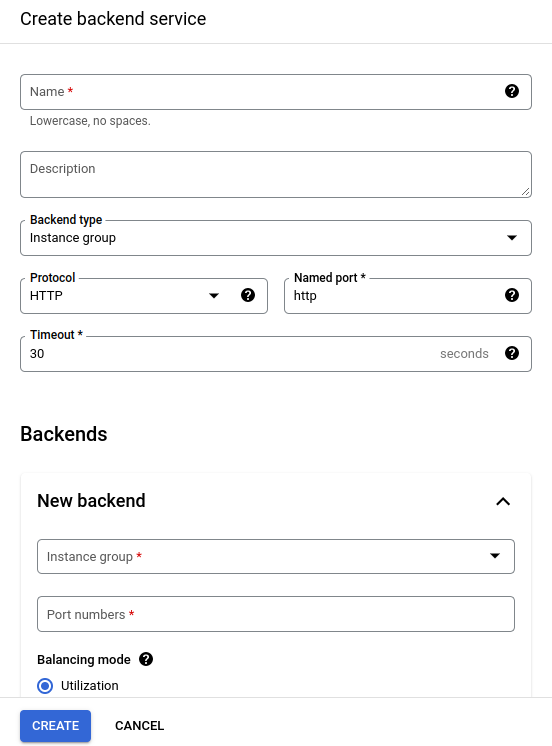
  5. Klik Backend Configuration. Di sebelah kanan, terlihat drop down menu dengan title “Backend services & backend buckets”. Klik drop down itu dan terlihat tombol “Create A Backend Service”. Klik tombol itu.
  6. Seharusnya terlihat gambar seperti berikut:
  7. Isi form itu dengan kerjaan sebelumnya, yaitu nama Instance Group dan Health Check. Scroll form Create Backend ke bawah. Jika sudah sesuai, klik tombol Create.
  8. Kamu masih berada di “Edit HTTP(S) load balancer. Klik Routing rules.
  9. Di form Host 1, isikan nama subdomain secara FQDN, di Path 1 isikan: /* dan di Backend, pilih backend yang barusan tadi kamu create. Kemudian klik Update.
  10. Login ke DNS Manager atau Domain Manager dan update DNS Record supaya subdomain mengarah ke IP Load Balancing GCP. Di panduan ini, namanya adalah lb-ssl. IP-nya bisa kamu lihat di langkah nomor 4. IP itu yg kamu update atau add ke DNS Record.
  11. JIka sebelumnya kamu sudah melakukan “systemctl start apache2.service” dengan SSL enabled di VM, maka GCP Load Balancing SUDAH SELESAI. Akses subdomain tersebut di browser. Semua senang karena tidak ada pesan error. Jika belum menyalakan service apache2 atau service apache2 masih ada error, maka selesaikan dulu konfigurasi apache2 yang di VM.

Pokok pikiran penyusunan master plan IT campus.

Setiap organisasi yang ingin IT-nya terarah pengembangannya, terkontrol budgeting-nya membutuhkan dokumen master plan yang bisa berfungsi sebagai:
1. Wadah penampungan ide-ide pengembangan
2. Roadmap pengembangan
3. Milestone pencapaian
4. Timeline kerja.

Bagi saya pribadi, karena bekerja di kampus, maka pokok-pokok pikiran yang dijabarkan di dokumen master plan adalah :

BAB I PENDAHULUAN   

  1. Latar Belakang   
  2. Visi dan Misi   
  3. Tujuan   

BAB II LANDASAN TEORI   

  1. Smart Class   
  2. Smart Campus   
  3. PHP CI   

BAB III ANALISIS

  1. Kondisi Sekarang   
  2. Penjelasan Gambar Bagan Organisasi   

BAB IV PEMBAHASAN

  1. Kendala Existing

1. Software tidak up to date.

2. Kurangnya rasio programmer:request SI.

3. Kurangnya dokumentasi.

4. Tidak ada product manager.

5. Tidak adanya panduan berbasis dokumen di setiap request SI.

6. Rasio hardware:jumlah user.

7. Tidak terintegrasinya Jurnal dan Moodle dengan SI yg ada.

8. Belum semua di-enkripsi.

9. Celah keamanan yg ada

10. BTS sebaiknya direlokasi ke gedung lain krn faktor sambaran petir

Valuasi IT UNPAB
a. Valuasi hardware
b. Valuasi software  

Kondisi Ideal Yang Hendak Dicapai   

BAB V PENUTUP

Why do I blog

This blog purpose is to record anything I do related to openSUSE. Well, sometimes it will Deutsch related stuff as I love that language. It will look like an archive for anything I found on the Internet for my specific needs like HAProxy, DRBD, Hawk etc.

Not everything I did would be documented here. The reason is (and always will be) I found it hard to spare some time to write documentation.

Another my personal documentation is here.